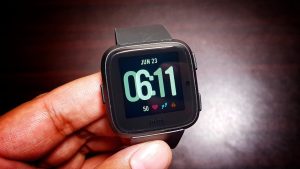
The Fitbit Versa is one of the popular smartwatch models available in the market today which offers several impressive health and fitness features. It’s a budget friendly device which costs less than $200 making it a great buy. The smartwatch is equipped with 4GB of RAM with 2.5 GB accessible for music storage.
If you would like to store music files on the watch then just follow the steps listed below.
How To Add Music To Fitbit Versa
To get music to your watch you will need a computer with a Wi-Fi connection and the Fitbit desktop app. You need to create at least one playlist of songs or podcasts in iTunes or Windows Media Player to download to your watch. If you use the Fitbit app on Windows 10, you can also create playlists in the Fitbit Music app using the drag-and-drop feature to add individual tracks.
On a Windows Computer
- Click the Start button on your PC and open the Windows Store
- Search for “Fitbit app” and when you find it click Free to download the app. If you’ve never downloaded an app to your computer, you’ll be prompted to create an account with the Windows Store.
- Click Microsoft account to sign in with your existing Microsoft account.
- Open the app after the download is complete.
- Log in to your existing Fitbit account.
- Make sure your watch and PC are connected to the same Wi-Fi network:
- From the Fitbit app dashboard, tap or click the Account icon -your device image.
- Tap or click Wi-Fi Settings
- Tap or click Add Network and follow the on-screen instructions to add your Wi-Fi network or check the Network list to make sure it’s already listed.
- Tap the network name > Connect.
- To see which network your computer is on, click the Wi-Fi symbol on your screen. Connect to the same Wi-Fi network as your watch.
- If your watch and computer are connected to different networks, manually connect to your watch to the same network as your computer. Return to the Wi-Fi Settings screen in the Fitbit app, tap the network name, and tap Connect.
- For best results, sync your watch in the Fitbit app, and then disable Bluetooth temporarily on your phone and computer.
- Plug your watch into the charger.
- On your PC, open the Fitbit app and click the Music icon
- Click Personal Music.
- On your watch, open the Music app and then tap Transfer Music.
- Wait a few moments for your watch to connect.
- When prompted, follow the on-screen instructions on your PC to choose or create the playlists you want to download to your watch. After you select a playlist, the download starts automatically. Don’t minimize the window until the transfer is complete.
- Take note that if you take several minutes to pick your first playlist, Wi-Fi may disconnect to preserve your battery. Tap the Transfer Music button again to reconnect and continue choosing your playlists.
On a Mac Computer
- Make sure your watch and your Mac are able to be connect to the same Wi-Fi network
- From the Fitbit app dashboard, tap the Account icon – your device image.
- Tap Wi-Fi Settings.
- Tap or click Add Network and follow the on-screen instructions to add your Wi-Fi network or check the Network list to make sure it’s already listed.
- Tap the network name > Connect.
- To see which network your computer is on, click the Wi-Fi symbol on your screen. Connect to the same Wi-Fi network as your watch.
- On your Mac, go to http://www.fitbit.com/setup.
- Scroll down and click the option to Download for Mac.
- Double-click Install Fitbit Connect.pkg. The Fitbit Connect installer opens.
- Click Continue to move through the installer.
- Sync your watch in the Fitbit app, and then disable Bluetooth temporarily on your phone and computer.
- Plug your watch into the charger.
- In the Fitbit Connect window on your computer, click Manage My Music.
- If prompted, log in to your Fitbit account.
- On your watch, open the Music app and then tap Transfer Music. Note that you may need to scroll down to see the transfer button.
- Wait a few moments for your watch to connect. Note this can sometimes take a minute or two.
- When prompted, follow the on-screen instructions on your Mac to choose the playlists you want to download to your watch. After you choose a playlist, the download starts automatically. If your playlist doesn’t appear, click the refresh icon and try again.
- Take note that if you take several minutes to pick your first playlist, Wi-Fi may disconnect to preserve your battery. Tap the Transfer Music button again to reconnect and continue choosing your playlists.

