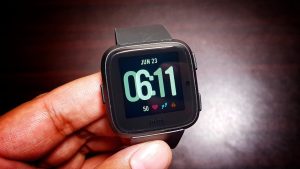
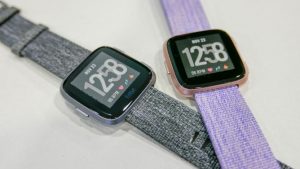
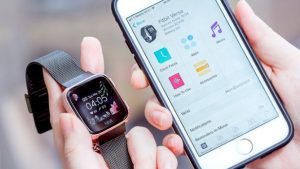
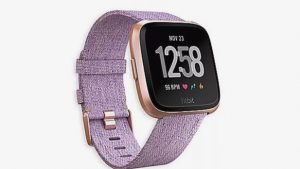
If you have a problem receiving or getting notifications on Fitbit Versa from a Galaxy S10, you must do a set of troubleshooting steps to identify where the issue is coming from. In many cases, the issue can be fixed simply by restart both devices or disconnecting Bluetooth. We suggest that you try these two solutions before doing any other suggestions below.
How to fix Fitbit Versa not getting notifications from Galaxy S10 | not receiving notifications from Android
There can be a number of factors that can cause problems on your Fitbit Versa. In this troubleshooting guide, learn how to fix your Fitbit Versa if it’s not getting notifications from your Galaxy S10.
Fitbit Versa not getting notifications from Galaxy S10 fix #1: Ensure Bluetooth is enabled
Your Fitbit Versa syncs via Bluetooth. If Bluetooth functionality is turned off on your Galaxy S10 or Android device, it won’t be able to forward notifications to your S10. On your Galaxy S10, pull down the notification bar, tap the Bluetooth icon, and make sure that Bluetooth is ON.
Also, make sure that your Fitbit device is within range of your phone. Bluetooth connection works best when both devices are less than 20 feet of each other. For troubleshooting purposes, make sure that you place both devices as close to each other as possible.
Fitbit Versa not getting notifications from Galaxy S10 fix #2: Check if phone bluetooth connects to Fitbit device
One of the common reasons why some Fitbit users report not being able to get notifications on their phones is that their Fitbit device is actually not connected to the right device. Make sure that yours is connected to your Galaxy S10 and not to any other device. For example, if you use a wireless headset like Samsung Galaxy Buds, it’s possible that your Fitbit Versa may be connected to it instead of to your Galaxy S10. To see if that’s the case, try to check the Bluetooth devices being detected by your phone and make sure that you tap on Versa to reestablish connection.
Fitbit Versa not getting notifications from Galaxy S10 fix #3: Check notification settings
On your Fitbit app, there’s a setting that you can check to ensure that notifications from your S10 are being forwarded to your Fitbit Versa. Here’s what you need to do:
- Open Fitbit app on your phone.
- In Today tab, select your account at the upper left.
- Tap your Fitbit Versa device.
- Tap Notifications.
- Make sure notifications for calls, texts, etc. are enabled or properly selected. If you are using multiple apps for, say, text messages, be sure to select the default or the one you’re currently using.
Fitbit Versa not getting notifications from Galaxy S10 fix #4: Check Do Not Disturb is OFF on phone
One other thing to check on your Galaxy S10 is the Do Not Disturb feature. When this is ON, the phone won’t be able to send your Fitbit any notifications at all. So, if you’ve already tried all the troubleshooting steps above but your Fitbit Versa is still not getting notifications from Galaxy S10, be sure that Do Not Disturb is checked.
Fitbit Versa not getting notifications from Galaxy S10 fix #5: Restart fitbit device
Restarting a Fitbit Versa can fix the problem if it’s not getting notifications from your Galaxy S10. There are two ways on how to restart your Fitbit Versa. Learn how to do each one below.
How to restart Fitbit Versa via Settings
This is the simplest way to restart your Fitbit Versa. Do this if you encounter problems, or if you want to conserve battery power.
- On your Fitbit Versa, go to the main or Home screen.
- Swipe left on the screen until you see Settings.
- Tap Settings.
- Scroll down and tap About.
- Select Shutdown.
- Tap Yes to confirm shutdown.
If you want to turn the watch back on, simply press and hold the Back (left) button for a few moments.
How to restart Fitbit Versa using 2-button procedure
An alternate way to reboot your Fitbit Versa is by pressing two buttons instead of going under Settings. This is a useful way to restart if your watch has become problematic or unresponsive. Doing this won’t delete your data so you can do it safely. Here’s how it’s done:
- On your Fitbit Versa, press and hold the Back and bottom right button for a few seconds.
- Once you see the Fitbit logo screen, release the buttons.
- Wait for a few seconds until the device vibrates. This signals that the reboot has been successful.
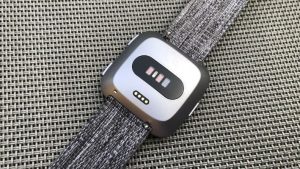
NOTE: Versa has a small hole (altimeter sensor) on the back of the device. Don’t attempt to restart your device by inserting any items, such as paper clips, into this hole as you can damage your Versa.
Fitbit Versa not getting notifications from Galaxy S10 fix #6: Restart Galaxy S10 or Android device
If restarting your Fitbit device won’t help, the next thing that you want to do is to restart your phone, in this case, the Galaxy S10. If you haven’t tried this yet, be sure that you do it this time. Try restarting it normally first by pressing the Power button to access the boot menu. Then, select Restart option and see if that works.
Another way to restart the device is by pressing and holding the Volume Down button and the Power key at the same time for 10 seconds or until the device’s screen turns on. This simulates the effect of having disconnected the battery from the device. If this works, this may unlock the device.
If doing the regular restart won’t help, then try this:
- Press and hold the Volume Down button first and don’t release it.
- While holding it down, press and hold the Power key.
- Keep both keys held down for 10 seconds or more.
The second restart procedure tries to simulate the effects of removing the battery pack. On older devices, disconnecting the battery is often an effective way in fixing unresponsive devices. If nothing changed though, proceed to the next suggestions.
Rebooting your device regularly at least once every week can be beneficial. If you tend to forget things, we suggest that you configure your phone to reboot on its own. You can schedule it to do this task by doing these steps:
- Open Settings app.
- Tap Device Care.
- Tap the 3-dot at the top.
- Select Auto restart.
Fitbit Versa not getting notifications from Galaxy S10 fix #7: Reconnect Bluetooth
Another simple way to deal with Fitbit notification problems is by temporarily disconnecting Bluetooth connection. Just pull the notification bar down on your phone, tap Bluetooth icon, and disconnect your Versa device. Then, restart your phone and reconnect it to your Versa to check.
Fitbit Versa not getting notifications from Galaxy S10 fix #8: Force quit Fitbit app on phone
Like any other app, Fitbit may crash for no apparent reason all of a sudden. That’s because there are a lot of possible points of failure in Android all the time. Sometimes, temporary glitch may develop in an app after an update or any coding changes in the operating system. Such bugs may go away when an app is refreshed though. To check if the problem is temporary, follow these steps to restart Fitbit app.
- On your screen, tap the Recent Apps soft key (the one with three vertical lines on the left of the Home button).
- Once the Recent Apps screen is shown, swipe left or right to look for the Instagram app. It should be here if you managed to run it previously. Then, swipe up on the app to close it. This should force close it. If it’s not there, simply tap the Close All app to also restart all apps.
Another way to force close an app is this:
- Open Settings app.
- Tap Apps.
- Tap the More settings icon (three-dot icon, upper right).
- Tap Show system apps.
- Find and tap the Fitbit app.
- Tap Force Stop.
Fitbit Versa not getting notifications from Galaxy S10 fix #9: Clear Fitbit app cache
In some cases, Fitbit problems are caused by a bad Fitbit app cache. To see if that’s the case, try clearing the app’s cache on your Galaxy S10. Here’s how:
- Open Settings app.
- Tap Apps.
- Tap the More settings icon (three-dot icon, upper right).
- Tap Show system apps.
- Find and tap the Fitbit app.
- Tap Storage.
- Tap Clear cache button.
- Restart the device and check for the problem.
Fitbit Versa not getting notifications from Galaxy S10 fix #10: Reinstall Fitbit app
This possible solution is a follow up to the previous suggestion. This will erase your Fitbit account from your phone (you won’t permanently lose your Fitbit account though).
Below are the steps to delete or uninstall an app:
- From a Home screen, swipe up or down from the center of the display to access the apps screen.
- Open Settings app.
- Tap Apps.
- Ensure All is selected (upper-left). If necessary, tap the Dropdown icon (upper-left) then select All.
- Locate then select the appropriate app. If system apps aren’t visible, tap the Menu icon (upper-right) then select Show system apps.
- Tap Uninstall to delete an app.
- Tap OK to confirm.
Once you’ve deleted the app, restart your phone before reinstalling it.
Fitbit Versa not getting notifications from Galaxy S10 fix #11: Reset network settings on Galaxy S10 or Android
Some Bluetooth problems are caused by incorrect network configuration. Make sure that you do the steps below to reset the network settings.
- Open Settings app.
- Tap General management.
- Tap Reset.
- Tap Reset network settings.
- Tap Reset settings to confirm.
Fitbit Versa not getting notifications from Galaxy S10 fix #12: Factory reset fitbit device
If your Fitbit Versa is still not getting notifications from your Galaxy S10, consider erasing the fitbit device by performing a factory reset.
There are two ways to factory reset a Fitbit Versa. The easier way to wipe your watch is to do the first option so we suggest that you try this first (hard reset via Settings).
How to hard reset Fitbit Versa via Settings
Unless your Fitbit Versa fails to turn on, wiping your device via Settings menu should be your primary option. Don’t forget: factory reset will return the software to its defaults. This means that all your apps and personal data will be erased, including cards you added under Wallet.
If you want to sell or give the device away, we suggest that you remove the Fitbit Versa from your Fitbit account first and forget the device on your phone.
To remove a Fitbit Versa from your Fitbit account:
- Go to www.fitbit.com and log in.
- From the Dashboard, click the device you’d like to remove.
- Scroll down to the bottom of the page.
- Click Remove This Fitbit ( Versa) From Your Account and click OK.
Now, if you wish to go ahead with factory reset, follow the simple steps below:
- On your Fitbit Versa, swipe left on the screen.
- Continue swiping to the left until you find Settings app.
- Tap Settings.
- Swipe down and tap About.
- Tap Factory Reset.
How to hard reset Fitbit Versa using hardware buttons
If you happen to be having an issue with your Fitbit Versa and it’s not allowing you to go to Settings menu, don’t worry. You should still be able to hard reset your Fitbit Versa using the hardware buttons. Again, this procedure will wipe the device and erase your personal data. Be sure to back your data up before doing the steps below.
- On the Versa, hold all three buttons for about twelve seconds. This triggers the 2-button hardware reboot after about eight seconds.
- When the Fitbit logo appears, then disappears, release the bottom right button, then continue holding the left and top right buttons until you feel a strong vibration. This indicates the factory reset was initiated.
- This process may take several seconds, and eventually, the Fitbit logo appears and the device boots and displays go to Fitbit.com/setup.
- If you fail to release the bottom right button in time, or otherwise don’t follow the procedure precisely, the Fitbit logo reappears quickly and boots without factory reset.
If you find this post helpful, please help us by spreading the word to your friends. TheDroidGuy has social network presence as well so you may want to interact with our community in our Facebook and Twitter pages.


